Manage Out-Of-Tolerance (OOT) Equipment
Manage and Investigate OOT Equipment
When performing calibrations on measuring equipment in Calibration Control (our Calibration Management Software), it is proper to check the condition of the equipment (aka unit-under-test or UUT) before calibration (As Found) and after calibration (As Left). If measurement equipment is found out-of-tolerance (OOT) before performing calibration, an assessment of the effect of the OOT condition on processes must be performed. If it has been 12 months since the last calibration of the UUT, all the product and processes the UUT measured in the last 12 months are suspect. For instance, were products or processes falsely judged good when they were bad?
Calibration Event
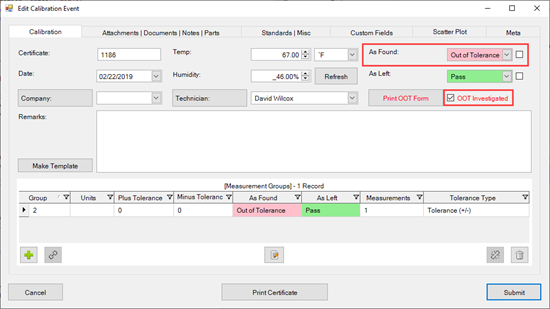
In a Calibration record, if the As Found field is OOT, the OOT 'Investigated' checkbox and the [Print OOT Form] button become visible. Upon finding OOT equipment, conduct an investigation in accordance with your organization's corrective and preventive action (CAPA) or nonconforming material (NCM) processes. After the investigation is complete, check the 'OOT Investigated' checkbox.
If useful to your organization's CAPA or NCM processes, print the OOT Form from the Calibration record for use as an investigative tool.
Red Highlighted Records
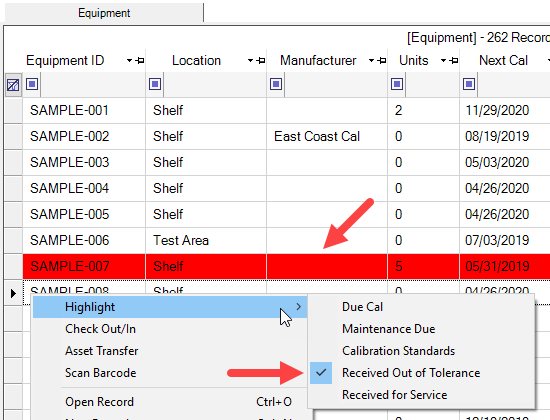
Calibration Events with pending OOT investigations are highlighted red in the Equipment grid when the 'Highlight - Received Out of Tolerance' option is enabled from the context menu. Clear the red highlighting by checking the 'OOT Investigated' checkbox for all Calibration Events (see above) that have OOT conditions for a given Equipment record.
Last Updated: 27 June 2019

