Database Import Process
What's Involved with Importing Your Data?
Ape Software can import your data for you. Importing is a manual process and unique for everyone so send us a copy of your current data and we'll provide an estimate.
Your Steps in the Import Process
There are really only two steps: (a) before you decide to do business with us, provide a copy of your data so we can give you an import estimate and (b) after you've chosen to use our software, give us another (current) copy of your data when you're ready for us to begin the import. We'll help you through each of the steps of deployment and configuration and answer your questions throughout the process.
Otherwise, the remainder of this page is for those who want to learn more about the process.
CUSTOMER STEP 1: Send Us Your Data for Estimate
If you need help giving us a copy of your data, give us a call and we'll be able to help via screen share. Otherwise, please refer to the following guidelines.
- Spreadsheets are Best: Spreadsheets are the easiest and fastest formats to import even if they need to be exported from an existing program.
- Best Spreadsheet Format: The best format for a good spreadsheet is strictly columns and rows without any additional formatting. The first row should have unique column names. Each column will only have data in it that relates to that column (e.g., date columns should have nothing but dates).
- Using SQL Server?: If your current database is on a SQL Server, send us a backup of that database.
- Other Formats: We can import from other formats as well. If you don't have spreadsheets, send us what you have.
- Entire Database: For an accurate quote, be sure to send us your entire database rather than just a sample. It's not the number of records as much as the uniformity of the data throughout the database that determines the amount of work required for an import.
- How to Send: After you zip your data, if the compressed file is larger than 20 MB, please upload it to a common file server (e.g., Dropbox, Google Drive, OneDrive, etc.) and send us a download link. Otherwise, if it is a small file, feel free to email it to us.
CUSTOMER STEP 2: Send Us Your Live Data for Import
For import projects estimated to last 2 hours or less, send us your data anytime and we'll get it back to you in 2-3 business days. For projects estimated to last more than 2 hours, we prefer to follow this schedule:
- Schedule: Please schedule with us an available time for importing your data. Sometimes we're importing another database that we need to complete before moving to the next import project.
- Send Data: Send us your LIVE data the same way you sent us your data for estimating (see step 1 above).
- One Week: Give us a calendar week to import your data. We often import data on the weekends to avoid distractions but, depending on support demands, we may be able to perform the import faster.
- No Data Entry: Remember that while we have your LIVE data, any additional data entry you perform in your database will not be included in the data we import for you. Therefore, please refrain from changing your existing database.
- Download Imported Data: When your imported database is ready, we will upload it to a Dropbox file server and send you a download link along with a link to our help file for deploying imported databases with further instructions.
- Deployment and Configuration: If you need help with deploying your database, installing software, or configuration, we can assist via screen share.
If you need a different schedule, please let us know as soon as possible.
Our Steps in the Import Process
This section is a response to the common question of, "Can't you just click a button and import it?". Unlike generic Office programs (e.g., Word or Excel), database management software requires a much more specific format. Additionally, there are no standard file format conventions that can help us predict and write import routines. Therefore, importing is a manual process.
APE STEP 1: Convert to Usable Intermediate Format
The first thing we'll do is convert your data to a usable intermediate format like an MS Access database file. The two largest time-takers in this phase are:
- Converting Current File Format: If the current format for your database is contemporary (e.g., spreadsheet or Access 2003 or higher), the initial conversion is usually easy. But if your data is in an old format that modern software no longer recognizes (e.g., dBase, Btrieve, Xtrieve, FoxPro, etc.) or is in a one-file-per-record system, we may need to use or write special software, drivers, and steps to get the data into an intermediate format we can manipulate.
- Fixing Incorrect Field Data Types: The problem fields are usually non-string types like date, number, and Boolean. If your current data has these types of fields with types of data in them that don't match the field types, we will manually correct, move, or remove inconsistent data before importing. For example, if your Last Calibration date field has text information in it like “no cal required” or “see Mike before calibrating” we will need to manually move that information to a different field.
APE STEP 2: Table and Field Mapping
If a database is provided for import (instead of a spreadsheet) and in the absence of detailed field and table level import instructions, we must perform the following investigative steps:
- ID Tables with Useful Data: We must open and evaluate the contents of each table to determine if those tables (a) have data to include in the import, (b) are empty, (c) contain old program settings, (d) contain unused data, etc.
- ID Links Between Tables: Depending on the organizational mind of the person who developed your current software, this can be very easy or extremely complex.
- Record Assumptions: The larger the size of an import project, the more important it is for us to record and communicate our assumptions regarding what we believe you wish us to accomplish. This step tends to alleviate future miscommunications.
APE STEP 3: Cleaning
Depending on the condition of your data and the needs of the customer, no matter the current file format, there are several common issues that can add lots of time to the import process. These include:
- Unique Equipment IDs: CC requires a unique identifier (e.g., Equipment ID or Asset #) for each Equipment record. When duplicates are present, we manually identify and change those duplicated IDs before import (usually with an alpha suffix).
- Moving Data to Proper Fields: Depending on you instructions, we will often identify and correct issues like Department names in People fields and vice versa or the equipment status (e.g., active, lost, at calibration lab, or checked out to Larry) in Department, Description, Date, or other fields.
- Delimiting Combined Fields: Sometimes old database programs have a limited number of fields so users make the best of this situation by combining multiple fields of data into a single field. For example, we often see single fields, like the Model Number, have a combination like Serial Number, Description, Size, Custodian (who has it), etc. This is one of the more manual processes of identifying and moving data within a single field to the proper fields and can take a lot of time, if directed by the customer.
- Extrapolating Equipment from Calibration Records: When Equipment records do not exist because the only records recorded are Calibration Histories, we must identify and remove (or group) duplicate Equipment data before we can create a single record for each Equipment.
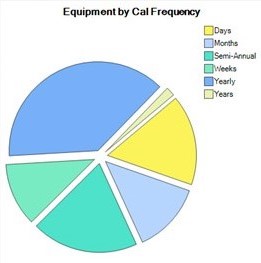
- Converting Frequencies: There are several different ways and formats to keep track of the Frequency (cycles) between calibrations. Our job here is to convert whatever method your old program uses to the system that Calibration Control uses. Fortunately we have a few decades of experience importing from other database formats so we’ve made our software versatile enough to adapt to just aboutany frequency.
- Create Linking Tables: Since our database uses a normalized format (i.e., modern, efficient, more accurate, & safer), we separate different types of data into different tables. For example, your old software may have the words for the various Departments and Users in a single table. We separate this information out into a Department and Person table that links back to the main Equipment table. This way, you only need to spell a person’s name once and in one place. Data entry errors like Bob S., Bob Small, B.S., and Robert S. (all representing the same person) are greatly lessened so you have much more accurate data entry, recall, reporting, and querying of your data.
- Importing Related Notes: Sometimes the data we import includes a related table of information, like Notes. In this case, the above process is repeated for each new table although these linking tables are usually less complex.
- Importing Related Calibration Events: We believe the best practice for most calibration histories is to not include those records in the import since the fields of data collected by different programs varies widely enough to cause at least some difficulty. In this situation, we do encourage users to maintain their old database in a read-only state for future research and auditing.
APE STEP 4: Actual Import
This is the easy part! After we’ve cleaned the data (above), copying your equipment data over into the new format takes just a few moments. It's the file conversion and data cleaning before the import that takes up most of our time.
APE STEP 5: Configuration
After we've imported your data, we implement whatever database configurations are required such as: (a) entering your product key, (b) renaming custom fields, and (c) calculating future due dates based on the recently imported data.
Steps in the Deployment Process
After the new database is imported and ready to deploy, it will need to be copied to your network and/or deployed on your SQL Server. The deployment process can be handled by the users or Ape Software.
DEPLOY STEP 1: Database Deployment
If using an MS Access database, refer to the Deploy Imported Access Database help topic. If using SQL Server, refer to the Add Ape Database to SQL Server help topic.
DEPLOY STEP 2: Install Software
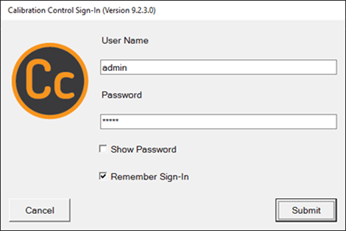
Download and install the most current version of Calibration Control on the first computer. The most current version can be downloaded from the Calibration Control Download page.
DEPLOY STEP 3: Configure Environment
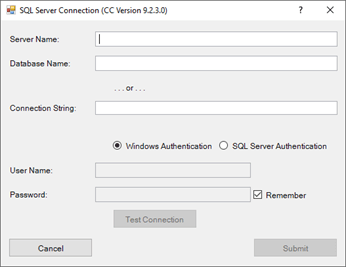
The configuration requirements differ primarily based on (a) the use of either MS Access or SQL and (b) if a network environment will be used instead of a single computer. If using MS Access, refer to the help topic for Move Application Database. If using SQL Server, use the Connect to SQL Server Database topic. Also, for both methods, refer to the Creating a Multi-User Environment topic.
DEPLOY STEP 4: Include Additional Client Computers
After the initial configuration is accomplished in DEPLOY STEPS 1-3, repeat the installation of the software on additional computers (as necessary) and connect each new installation with the central database. The configuration for Common Data Folders, referred to in the Creating a Multi-User Environment only needs to be performed once.