Caliper Calibration
Purpose
The purpose of this procedure is to provide general instructions for the calibration of calipers including dial, vernier, digital, or a combination thereof.
Scope
All calipers used to measure, gage, test, inspect and control part compliance to customer specifications and drawings.
Procedure
Preliminary Instructions and Notes
- Read this entire procedure before beginning the calibration.
- Calibration shall be performed in an environment that conforms to Manufacturer Specifications.
- The caliper will hereafter be referred to as the Instrument Under Test (IUT).
- Verify that the IUT is clean.
- Visually examine the IUT for any condition that could cause errors in the calibration.
- If any of the requirements cannot be met, refer to the applicable manufacturer manual.
- If a malfunction occurs or a defect is observed while calibration is in progress, the calibration shall be discontinued and necessary corrective action taken; if corrective action affects a measurement function previously calibrated, the function shall be recalibrated before the remainder of the procedure implemented.
- Use extreme care when removing dirt, fingerprints and other foreign substances so that cleaning solutions do not enter internal portions of the IUT.
Reference Material
Applicable Manufacturers Manual or Brochures.
Specifications
The specifications of the IUT are determined by the applicable manufacturer's documentation. If the manufacturer's documentation is not available, then the specifications identified in this procedure are used.
Equipment Required
The Standards listed below should be selected on the basis of their higher accuracy level when compared to the unit under test. Equivalent Standards must be equal to or better than the Minimum-Use-Specification.
Minimum-Use-Specifications for Standards listed are 1/4 the accuracy required by the IUT.
- Cleaning solution
- Hard arkansas stone
- Lint free cloth
- Gage block set
- Fine wire or nylon brush
- Gage oil
Detailed Procedure
- Carefully examine all gaging surfaces for nicks, burrs, scratches, wear or other signs of mishandling that may affect accuracy of the instrument. Remove any positive surface imperfections utilizing a hard arkansas stone.
- Apply sufficient amounts of cleaning solution to dampen a lint free cloth. Carefully clean all exposed surfaces removing all foreign substances and particulate matter. (Use brush on pinion track if necessary.) Lightly apply gage oil to cleaned surfaces.
- Check O.D. jaws when in the closed position. Hold calipers to light source and visually examine for light between the jaws. Light will not be seen if jaws are parallel.
- Check I.D. knife-edge jaws for wear when in the closed position. Caliper must be positioned squarely in line of sight to detect air gaps or surface imperfections between jaws.
- Verify zero setting of caliper by observing the indicated reading with jaws in the closed position. If caliper does not read 0.000, dial calipers can be easily adjusted to zero by loosening the bezel lock screw, then rotating bezel to align the zero graduation to the pointer. Some vernier calipers have sliding scales that may be adjusted.
- Check the step-measuring feature (if model is of this type) using gage blocks. Note dial readings when checked at zero and at the measured value of the gage block(s).
- Check depth measuring feature (if model is of this type) using gage blocks. Note readings when checked at zero and at the measured value of the gage block(s).
- If any defects have been found at this point that would affect accuracy or function of the gage, discontinue calibration and refer to section 3.6 for remedial action.
-
Check four quadrants equally spaced throughout the entire measurement range of the
caliper. e.g., 1.000", 3.000", 4.000", and 6.000".
- Align the beam of the caliper to be as nearly parallel to the line of measurement as possible.
- Tighten clamp screw on the movable jaw without disturbing the "feel" between the caliper and gage block(s) to ensure precision measurements. The clamp screw must be tightened due to the "play" within the sliding member on the movable jaw.
- Read caliper (if possible) without disturbing placement. If not, carefully remove caliper to obtain reading.
- Repeat the measurement steps a sufficient number of times to rule out any obviously incorrect readings.
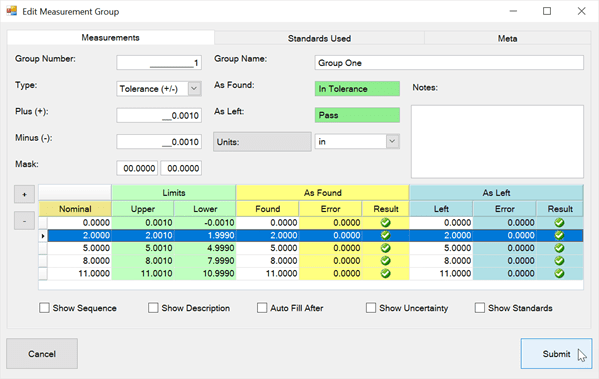
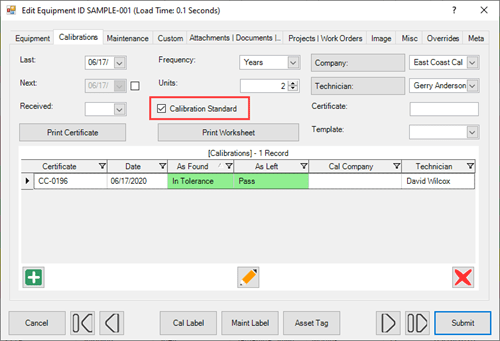
- Record all above readings on the Equipment Calibration Record.
- Label each instrument with calibration date, due date and person performing calibration.
Gage Correction
Any gage exceeding specified tolerances at any time during calibration shall be repaired and recalibrated, returned as is for restricted use, or scrapped.
All repair work shall be performed by a qualified individual.
Reason for Reissue
Revision A - First Release