Metrology
(Inspection, Measuring, & Test Equipment)
Purpose
This procedure establishes the methods used to control electrical and mechanical instruments and tooling that are used for manufacturing, assembly, testing and inspection at YCNH.
Scope
This procedure applies to all YCNH employees that make use of Inspection, Measuring, or Test Equipment.
Procedure
Quality Assurance is responsible for identifying the measurement tooling and systems to assure they meet the requirements of this procedure.
Categories of Test Equipment
Test equipment is purchased commercial or YCNH custom-made equipment used as a media of test and inspection acceptance, or that can influence final product configuration and performance. All test equipment can be broken down into the following 3 categories:
Calibrated
All calibrated test equipment is assigned a calibration cycle (usually 12 months). The equipment is verified to operate within the specified tolerances of its metrology procedure each cycle.
Not Calibrated
Equipment identified as "No Calibration Required" (NCR) requires no regular verification or maintenance. The primary purpose for identifying equipment as NCR is to alleviate concerns that a user would have pertaining to its calibration status.
Out-of-Service
Equipment that is no longer needed, serviceable, or cannot be calibrated will be physically segregated and identified as out-of-service. All equipment that is stored within the Metrology Cage (Met Cage) is considered out-of-service and does not require individual identification. The Met Cage is a limited access area.
Test Systems
More than 1 piece of test equipment may be used in combination to attain a test system. When this occurs, the system is evaluated and a determination is made as to whether each unit will be controlled or the system controlled as a whole. When used as a system, each unit is physically attached to the system to prevent the equipment from being used individually without adequate controls.
DC Power Tools
DC power tools (electric nut and screw drivers) do not require calibration unless the procedure that mandates it's use requires it.
Equipment Identification
All equipment controlled in accordance with this procedure will be identified with a metrology asset number. Small hand held instruments and tools can be marked by such methods as a vibrating pen, impression stamping, string tag or electronic etching. When it is impractical to apply labels to the equipment (such as pin gauges) the labels may be applied to the container.
Measure Database
The measure database lists the items which are controlled by this procedure. The measure table is accessed monthly, as a minimum, to identify equipment due for periodic calibration.
Paper Records
Metrology Procedures (MP's)
Each type of equipment subject to calibration by YCNH Quality Assurance (in-house) has a Metrology Procedure (MP) designated which completely establishes the method of inspection and maintenance for that type of equipment. This information is derived from instruction books, specifications, drawings or tool release and change notices, etc. The instructions derived from manufacturer specifications need not be rewritten but may be referenced in the measure database. MP's will be approved by the Quality Assurance Manager.
Calibration Label
Upon completion of calibration and providing the equipment is found satisfactory, it will be tagged with a calibration label (the only exception is in Section 3.8.1). This label will indicate the calibration date and the due date of the next inspection. This label will be stamped or initialed by the person performing the calibration.
Calibration Data Sheet
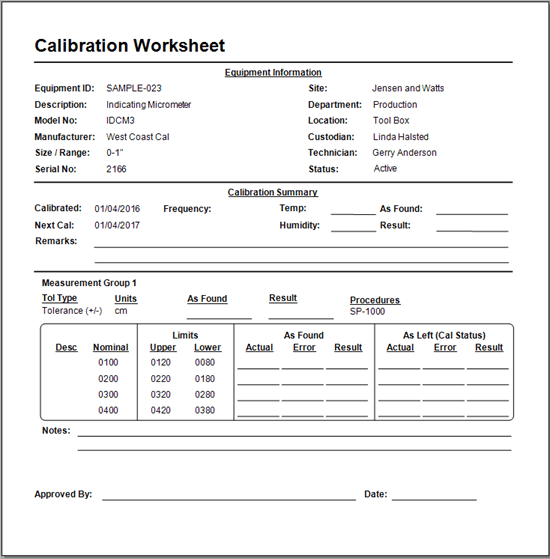
During the calibration of certain pieces of equipment, a data sheet is filled out if required by the procedure. The purpose of the data sheet is to record test readings and their variance from optimal values designated in the equipment's MP.
External Calibration and/or Measurements
Qualification
No contracted metrology laboratory is used until it has been qualified by an audit of their facilities and procedures verifying compliance with MIL-STD-45662a. MIL-STD-52B will be used as inspection criteria for MIL-STD-45662a. Out-of-state laboratories with a small fraction of the calibration work will be audited only by phone and mail.
Calibration Certificate
A calibration certificate is required in all cases where calibration is performed by an outside source. This certificate will include the following minimum information:
- Date of Calibration,
- Identification of the equipment to which the certificate pertains,
- Before and after measurement values of the equipment, and
- Proof of traceability to NIST (or other natural constant) for the accuracy of equipment used in the calibration.
Calibration Seals
Calibration adjustments, accessible from the outside of the equipment (other than zero/standardize) and access to internal adjustments are made tamper proof. This is accomplished using glyptol or frangible labels. Breaking of these seals voids the calibration.
Internal Calibration and/or Measurements
Mechanical
Caliper, Micrometer and Dial Gage Certification defines the proper method of calibrating YCNH's mechanical test equipment. Each mechanical piece of equipment will be marked with an asset number but does not require a calibration label due to size or ability of label to remain in place.
Digital Multimeters
All multimeters will be audited and calibrated. Each multimeter will have an asset label attached.
YCNH Products (Samples)
No calibration is required on samples. All samples must be clearly identified as samples. Also, samples must be either clearly marked as 'visual sample' or 'functional' sample. If the unit is a functional sample the unit must pass a QA inspection.
YCNH Made Products)
YCNH made products do not require an asset number or NCR label unless the inspection procedure that mandates its use requires it and it is not at risk of becoming mixed with finished goods. All test fixtures are classified as NCR based on the fact they present an Alpha Risk, not a Beta Risk. These fixtures include and are not limited to YCNH products.
Alpha risk is a risk associated with the producer only. In other words, under the alpha risk assumption any defective product would be rejected before being sent to a customer. A beta risk is a risk associated with the customer. In other words, a beta risk could possibly reach the customer.
Control Procedures
YCNH Designed Equipment
YCNH designed test equipment is controlled in accordance with this procedure if it is used for final inspection on finished goods.
Customer and Personal Equipment
If customer or personal equipment is used within YCNH, it is controlled in accordance with this procedure.
Equipment Receipt
When test equipment is received at YCNH, Receiving must notify or deliver the equipment to Receiving Inspection. The new test equipment shall be logged into the metrology database prior to use for product acceptance or within eight days of receipt, whichever occurs first. At this time the equipment will be evaluated and, as required by this document, be given a control number, metrology procedure, and calibration label.
Frequency Control
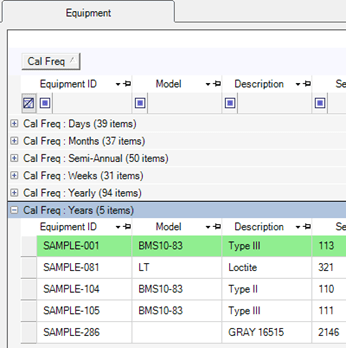
The frequency of inspection will be based on the purpose, degree of usage, equipment type and stability. Initial frequency will normally be determined from performance of similar equipment or by manufacturer specifications. The frequency can be determined using histories, commercial and military guidelines, or usage and environment.
Calibration Due Date
After the frequency is established, a specific calibration due date is defined and the calibration label is attached to the equipment. The metrology database records the calibration date and cycle. From these two numbers, a calibration due date is calculated that may be as much as 3 days different from the date on the calibration label. All equipment will be re-calibrated by the due date in the calibration database.
Calibration Frequency Adjustments
Temporary Extensions
Temporary extension of calibration intervals may be authorized under certain conditions (i.e., completion of test in progress or no usage of mechanical equipment). These extensions must be authorized by Quality Assurance and must be based on in tolerance results of past calibrations or an unbroken wax seal (mechanical equipment only). This decision will be documented in the measure history database. In addition, the instrument must be found to be in tolerance upon calibration or an instrument discrepancy report must be prepared.
The extension period may not exceed 1/3 of the calibration interval for electronic equipment. Mechanical equipment can be extended a cycle at a time if the wax seal has not been broken at the time of extension. All extensions will be entered in the measure history database.
Lengthening Intervals
Frequency intervals may be lengthened on instruments that have exhibited no out-of-tolerance conditions in 5 consecutive evaluations or as might be expected on plug or pin type gauges with minimum use. Interval adjustments must be approved by Quality Assurance and recorded in the measure history database.
Shortening Intervals
Intervals must be shortened when an out-of-tolerance condition has occurred in 2 out of 5 evaluations. Out-of-service conditions do not count in this calculation (i.e., blown fuse or broken meter).
Equipment Storage and Issue
Adequate storage facilities must be established for equipment to prevent loss or inadvertent damage due to temperature, humidity, vibration, shock and handling. Equipment will be appropriately protected during transport and handling.
Disposition of Obsolete or Defective Equipment
Obsolete or defective equipment will be removed from service. If the equipment is later reused, it must be re-inspected as required per this procedure. If the equipment is beyond repair, it will be permanently removed from service. Defective equipment will be stored in the metrology cage and labeled with a red tag until repaired or discarded.
Handling of Out-of-Tolerance Equipment
When, during the course of normal calibration, controlled equipment is found to be out-of-tolerance or defective, the effect of the out-of-tolerance condition on YCNH product will be assessed. It is the responsibility of Quality Assurance to determine the impact on products tested with the defective equipment since the previous calibration and take necessary action.
Accuracy Ratios of Calibration Instrumentation
When an instrument is used as a calibration standard to calibrate a second instrument, the accuracy ratio will be at least 4:1. When a ratio of 4:1 is not possible, a lower ration may be used based on availability, economics, and practices suggested by NIST or other qualified laboratories. When instruments are used at the YCNH plant which approach the accuracy of NIST, the accuracy ratios will be as high as feasible within the desired outcome of the testing and the economics involved.
Environmental Conditions
The environmental conditions (temperature and humidity) will be monitored during equipment calibration to assure they are within the acceptable limits of the metrology procedure in use.
Reason for Reissue
Revision A - First Release

