Enable Network Access to SQL Express
Once you have SQL Express set up on your local computer, you can allow remote connections for members of your network. There are different ways to do this and these steps may not work for your existing network environment or authentication methods. Below is a simple approach for SQL Server Express Edition that is set up on a local computer, and SQL Server authentication is used for members of the same network to remotely connect.
Security & Connections
- Open SQL Server Management Studio (SSMS)
- Connect to your server
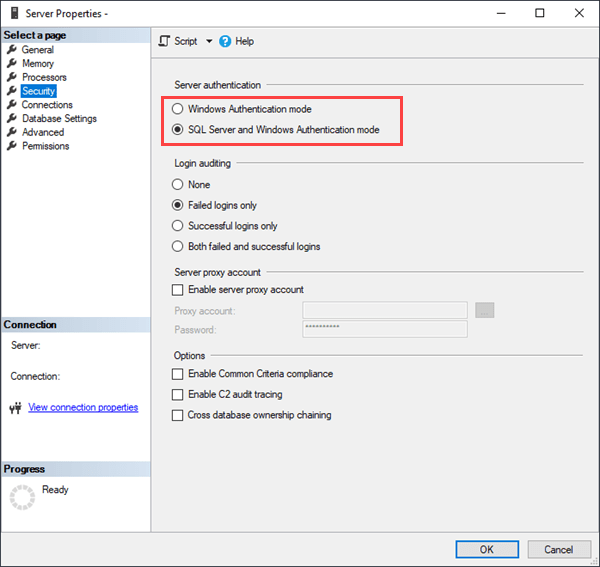
- Right-click on your server name and click 'Properties'.
-
Go to the Security page for Server Authentication, and select 'SQL Server and Windows Authentication' mode.
-
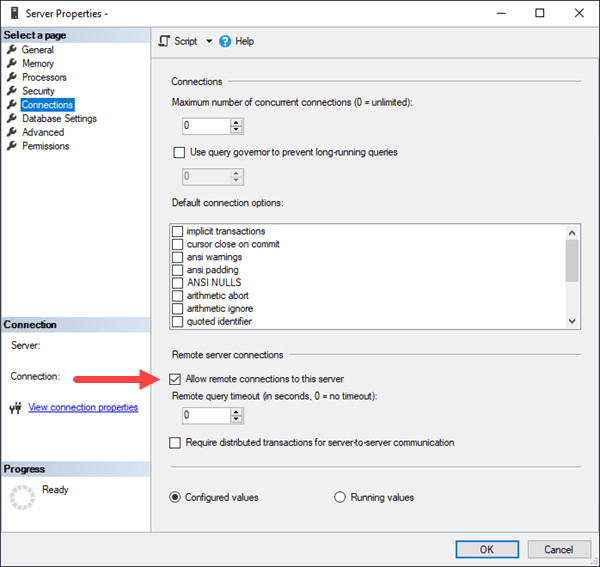
Then, go to the Connections page and ensure that "Allow remote connections to this server" is checked, and click OK.
SQL Server Authentication
Now that we've ensured your server is set to allow remote connections, you can set up a login for the server and the specific Calibration Control database (apecal). The following steps will explain how to create a universal SQL Server Authentication login for Calibration Control users to enter in the SQL Server Connection dialog to connect the database. (Note: If desired, you could give users their own individual logins using SQL Server Authentication or Windows Authentication if that's most preferred in your work environment.)
- Expand the Security folder under your Server
- Then, right click the Logins folder and select New Login...
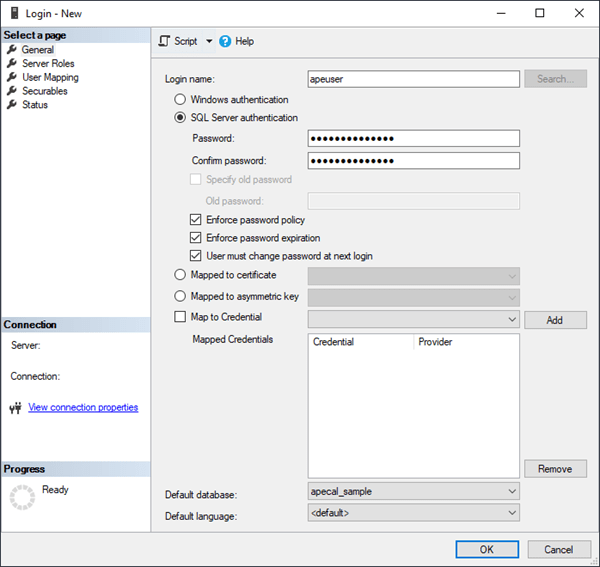
- Type in a generic user name that all users will use, such as apeuser.
- Select SQL Server Authentication.
- Enter a password. (It is entirely up to you if you want to keep "Enforce password policy" checked, as deselecting it will deselect the other checkboxes below it.)
-
Select your apecal database as the default database.
- Next, under the Server Roles, public will automatically be selected and cannot be deselected. You can optionally select additional roles to grant to this user.
- Then, open 'User Mapping' and choose the apecal database
- Under the database roles, select db_datawriter, db_datareader, db_owner and save changes.
- After that, expand the Databases folder by double-clicking it or clicking the plus sign.
- Expand your apecal database and then its Security folder
- Expand the Users folder and double click the login you just created.
-
Click the Membership page and double check that the user has the minimum required roles (at least db_datareader and db_datawriter). Click OK.

SQL Server Configuration
Your server is set up to allow remote connections with a SQL Server login but now you must enable TCP/IP protocols for your server.
- Open SQL Server Configuration Manager
- Expand SQL Server Network Configuration and Protocols for {Your server name}.
-
Right-click 'TCP/IP' and select Enable. Then click OK on the message that the service needs to be restarted before changes take effect.
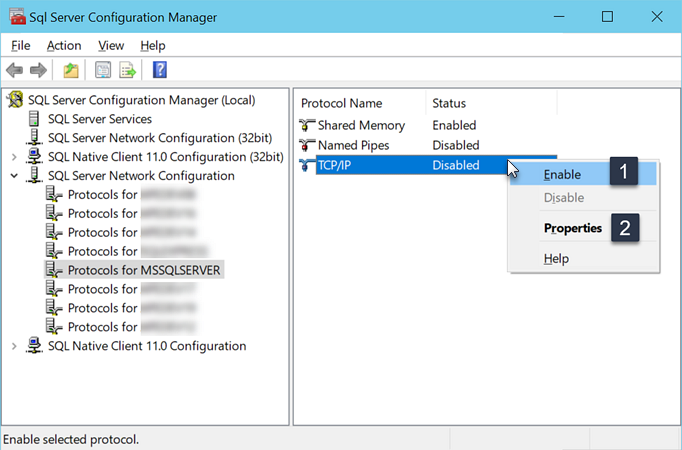
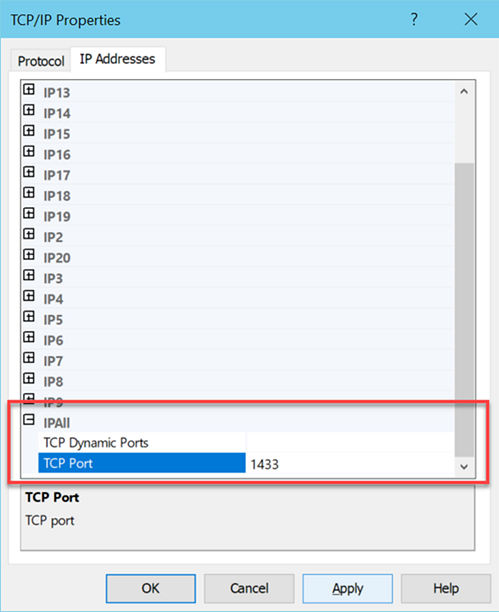
- Right-click 'TCP/IP' again and select Properties. View the IP Addresses tab and locate 'IPAll', (all IP Addresses).
- Enter the value '1433' directly in the TCP Port field. Click OK to apply the change, and click OK on the message that the service needs to be restarted before changes take effect.
-
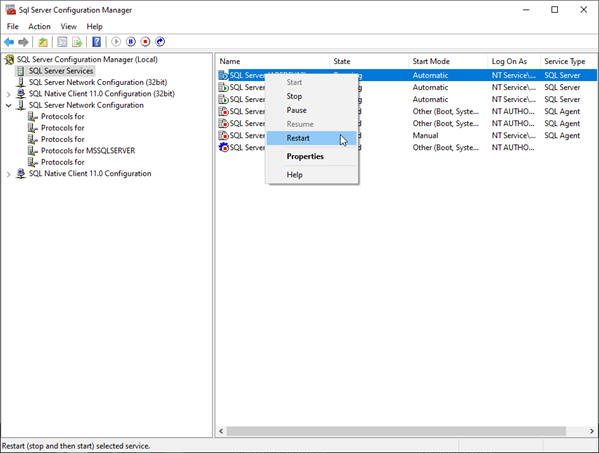
Back in the SQL Server Services dialog, right-click on your server name and select Restart. Alternatively, you can do this from SSMS by right-clicking the server name and clicking Restart.
Windows Firewall Configuration
TCP/IP is now enabled on your server. The next step requires allowing specific ports to connect to your server.
- Open Windows Defender Firewall with Advanced Security
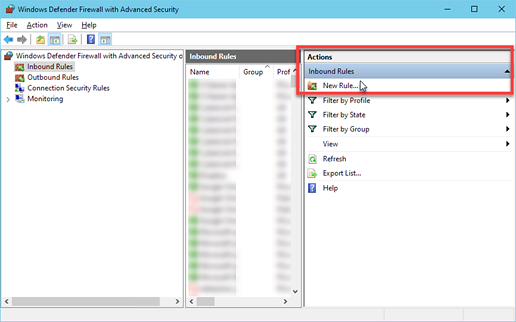
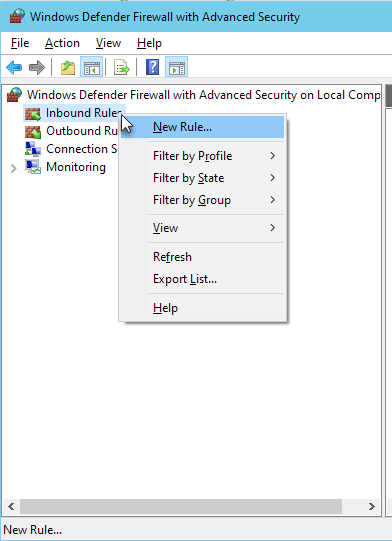
- Click on Inbound rules
- Then, select 'New Rule' located on the right under the Actions menu.
-
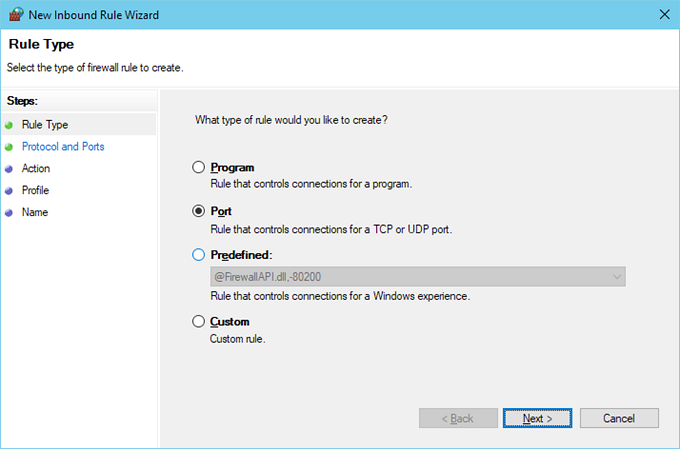
Select 'Port' and click Next.
-
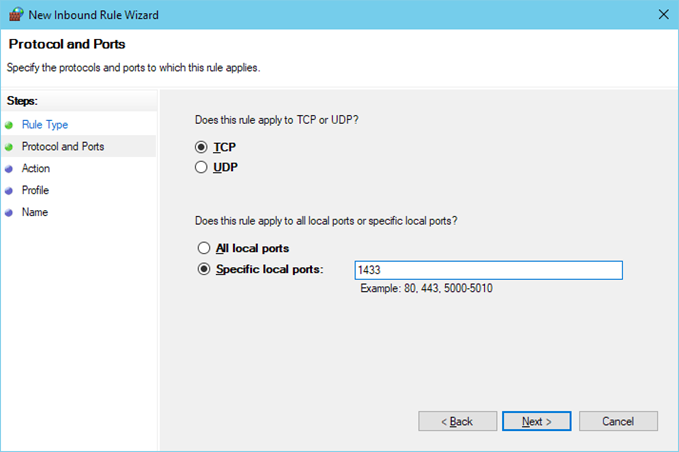
Select 'TCP' and then enter the Specific Port: 1433.
- ↪
For more, this Microsoft article lists other ports used by SQL Server: https://docs.microsoft.com/en-us/sql/sql-server/install/configure-the-windows-firewall-to-allow-sql-server-access?view=sql-server-ver15#ports-used-by-
- Action: 'Allow the Connection'. Continue clicking Next.
- Finally, create a Name for the New Rule, (e.g., "SQL PORT TCP Connection"). And click Finish.
- Next, create another new Inbound Rule.
-
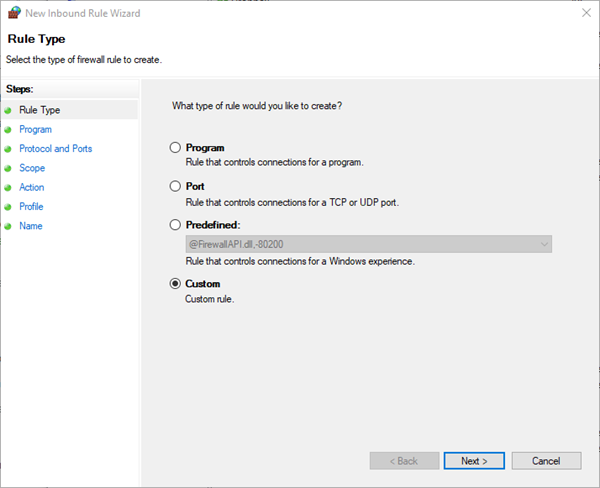
Select 'Custom' to create a custom rule, and click Next.
-
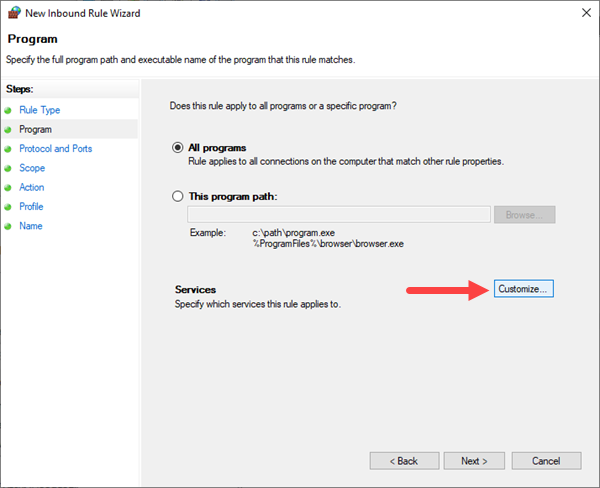
Under the Services section, click the Customize button.
-
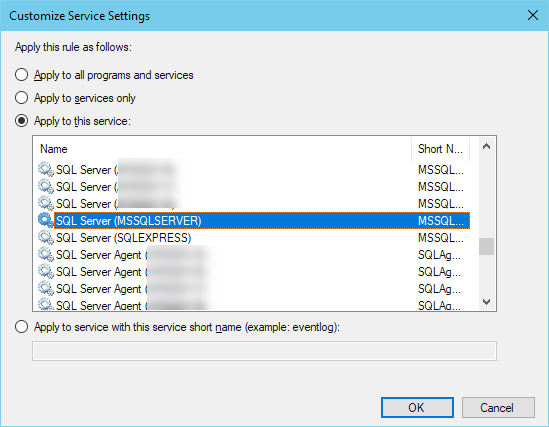
Select 'Apply to this service' and select your SQL Server, then click OK.
- Continue clicking Next all the way through, and create a Name of this New Rule, (e.g., "SQL SERVER TCP CNN"). And click Finish.
Server Connection
Using SQL Server Management Studio, test the server connection for any computer. In the Server name field, enter the computer's IP address followed by a comma and a space, then the Port number 1433; (Example, 72.45.194.229, 1433). Select 'SQL Server Authentication', and enter log-in credentials.

Establish server connection where Calibration Control is installed by simply using Calibration Control SQL Connect. If Calibration Control is open, (e.g. sample database or Access database), you can view the Utilities tab of the ribbon and select 'SQL Connect'. Enter your connection credentials.
Or, if the test connection is not successful, refer to this help page for Troubleshooting SQL Server Connection for testing with a UDL File on the computer from which the SQL Connection failed.
Last Updated: 14 September 2022