Backup and Restore SQL Server Database
Create a Full Database Backup
While there are many ways to back up your database, a full database backup backs up the entire database (including part of the transaction log) which makes it simple to restore. However, as the size of the database increases, full database backups will take longer to complete and require more storage space. For larger databases, consider using a series of differential backups in addition to a full database backup.
- Using SQL Server Management Studio, log in to the appropriate server with sufficient permissions and, if needed, expand the server tree.
- Expand the Databases folder.
-
Right-click the database that you wish to backup, hover over Tasks, and then click Back Up....
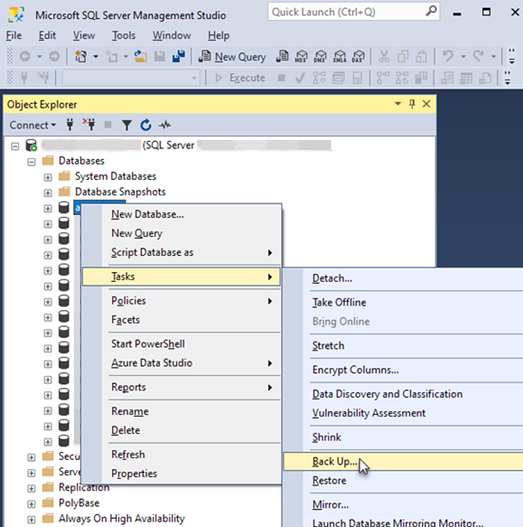
- The Back Up Database dialog will appear and you will see your selected database in the dropdown list. You can select a different database from the dropdown if you choose to do so.
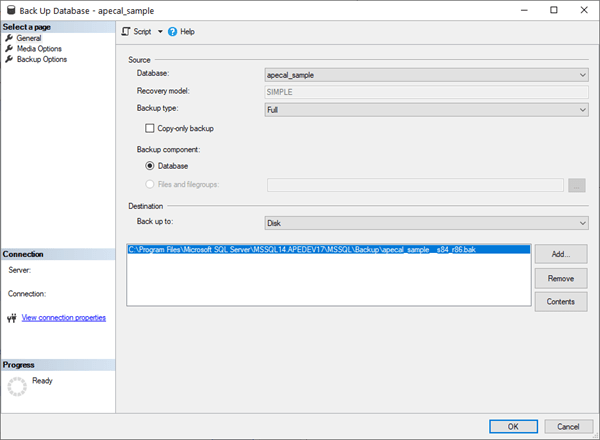
- By default, the Backup type will be Full. You must create a full backup before you can select a differential backup type.
- Choose Database under the Backup component (if not already selected).
- Under the Destination section, your database will back up to a default SQL Server Backup location, however you can Add/Remove additional location(s) or remove the default file path in order to Add and rename the backup file name (still using the default backup location). Ensure you have read/write permissions to the selected file path.
- Note: If you have previously created a backup of the same database, go to the Media Options page and review the settings. Choose whether this backup will append to the existing database or overwrite it.
- Recommendation: Go to the Backup Options page and review the settings. Under the Compression section, compress the backup to save storage space (database compression is not available in SQL Express).
- Click OK to start the backup process. Once the backup is successful, a dialog will appear to notify you.

Restore a SQL Server Database Backup
Follow these instructions for restoring a full database backup. Once again, using SQL Server Management Studio, connect to the appropriate server and expand the server tree.
- Right click the Databases folder and select Restore Backup
-
Select Device as the Source.
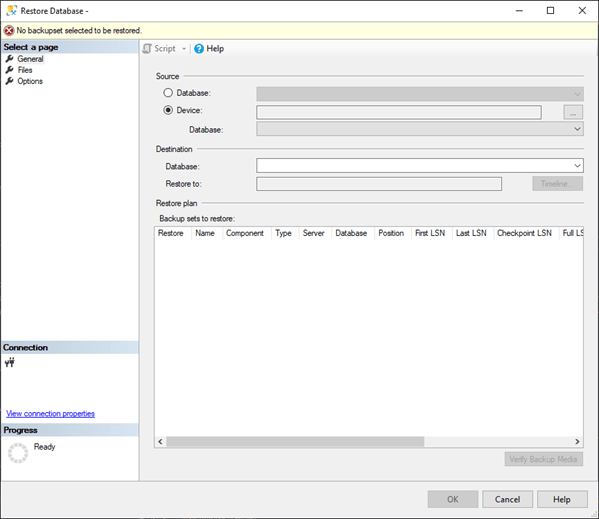
- Click the browse button ...
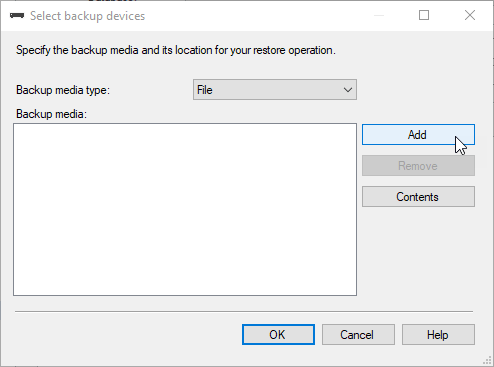
- Then, click on the Add button. The dialog will automatically show available backups in the default backup location. If you previously saved your backup in a different location, copy the path and paste it in the Backup File Location box.
Note: Only .BAK file types will be available in this dialog. - Select your backup file and click OK.
- The database name may be automatically loaded if you previously restored this backup. You can change the Database name if needed.
-
At the point, you may see "Ready" at the top of this dialog. This means you can restore your database now or continue and adjust additional settings.
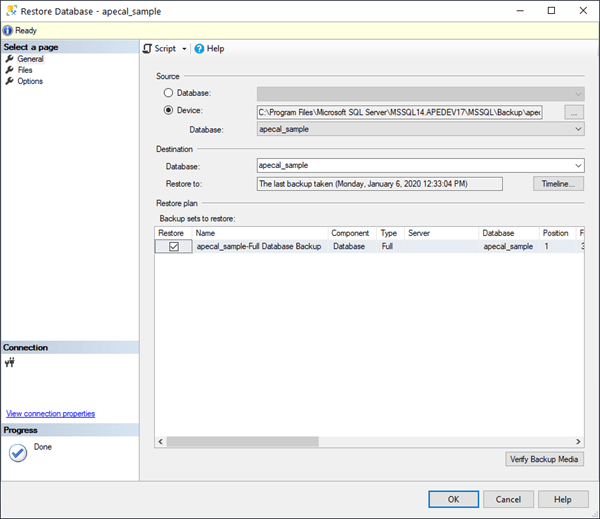
- The restore process may fail if there are existing connections. To prevent this, go to the Options page and check "Close existing connections to destination database" located under the Server connections section.
- Optionally, if you want to overwrite an existing database, select "Overwrite the Existing database". The database name will need to match the existing database.
-
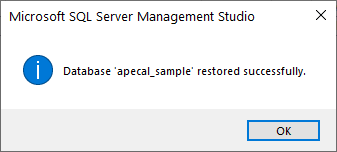
Click OK to start the restore process. Once the restore is successful, a dialog will appear to notify you.
More SQL Server Help Topics
Get Ape Support
Contact us if you need to setup a screen share, or you can send us the most recent backup of your database and describe with what you need our help.

