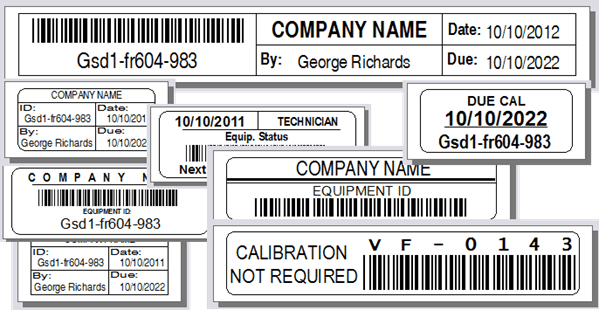
Status Change Dialog
Quickly Change Status of Multiple Equipment
Change the status of multiple pieces of equipment quickly and accurately in Calibration Control (our Calibration Management Software). When receiving several pieces of equipment for calibration (or any other status), users can change the status of multiple tools in consecutive order with a simple barcode scan, once the desired Status field is selected. Additional functions can be enabled in your Calibration Options.
There are two dialog formats available: the traditional dialog (described first) performs a Status Change of a single Equpment record at a time, and the multi-transactional dialog (described second) can support changing the status of multiple Equipment records at a time.
Equipment Status Change
Open the Status Change dialog is from the Tools tab of the ribbon menu.

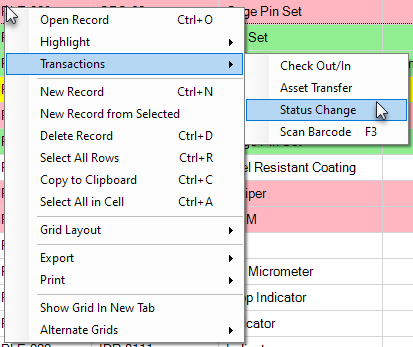
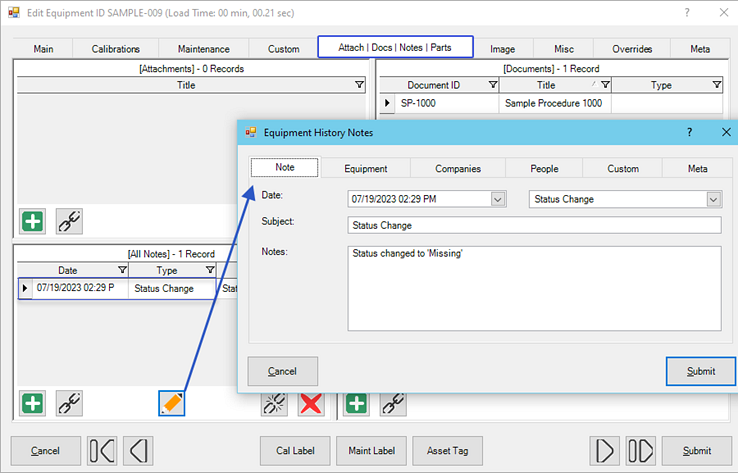
The Status Change activity dialog can also be opened from the Equipment Grid by right-clicking directly on an Equipment record and selecting 'Status Change' from Transactions in the context menu. All status changes made from the feature dialog are also automatically logged in that Equipment dialog's Notes tab, as described at the bottom of this page.
Using Status Change Dialog
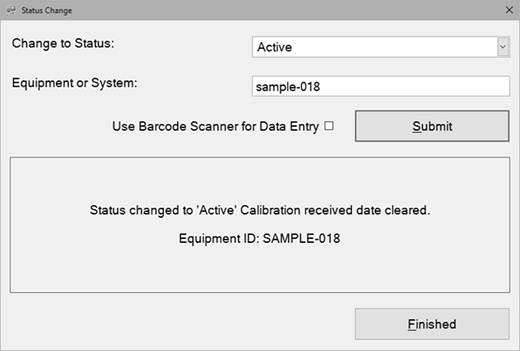
In the traditional Status Change dialog, select a status code in the “Change to What Status?” field combo-box. If entering the Equipment ID manually, uncheck the "Use Barcode Scanner for Data Entry" checkbox, and manually type in the Equipment ID and click [Submit].
Repeat with as many pieces of equipment that require the new status. When all necessary status changes are completed, click [Finished] to exit the Status Change dialog.
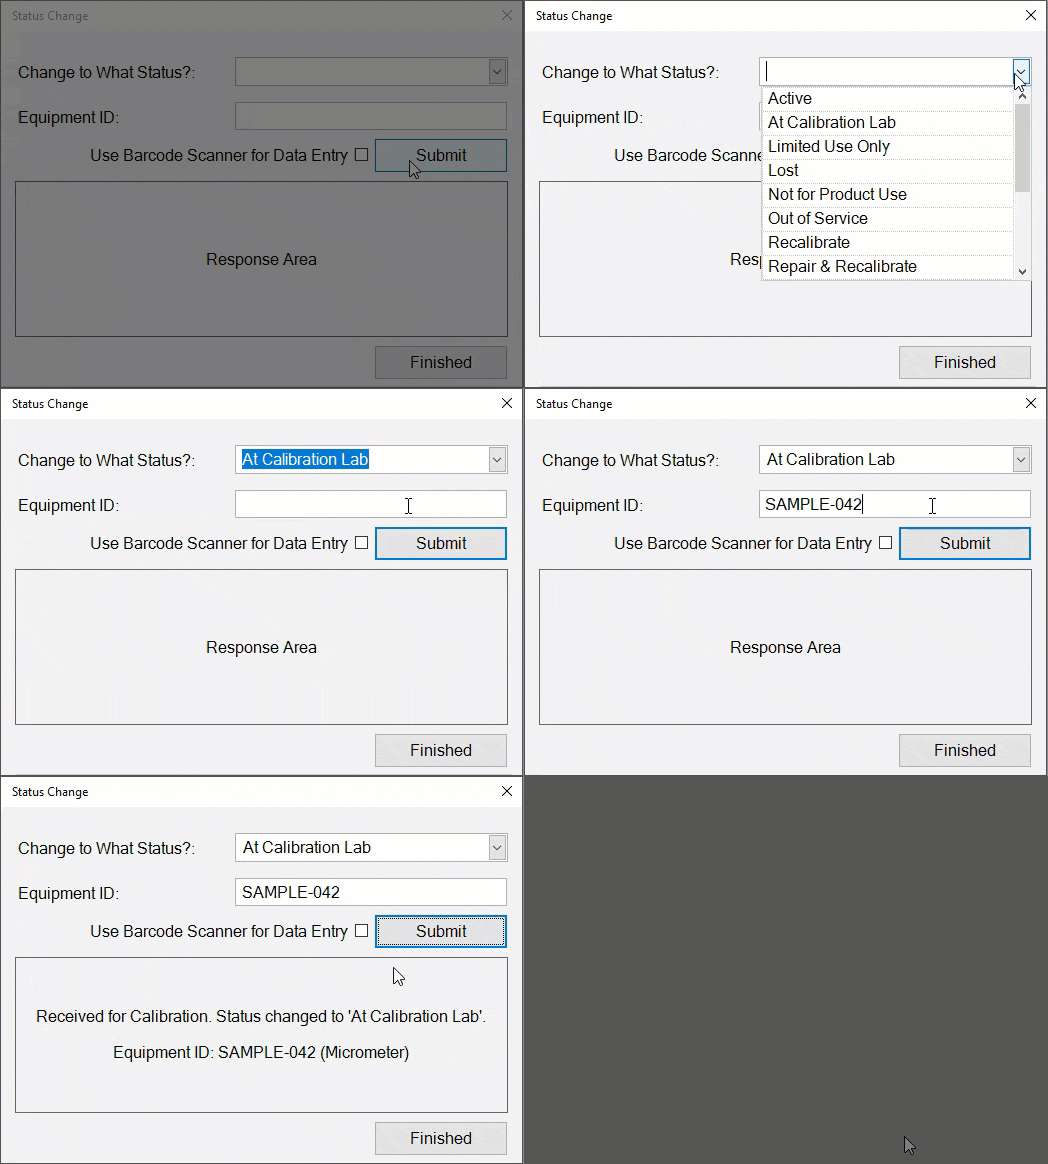
If using a barcode scanner, ensure the "Use Barcode Scanner for Data Entry" box is checked and scan the barcode on the asset label previously printed from Calibration Control. This setting will be remembered the next time you open Status Change. (Note: You may not need to click the [Submit] button using a scanner, depending on the scanner's carriage return settings.)
Repeat the equipment scan, or data entry, until all necessary status changes are complete. Click [Finished] to close out of the Status Change dialog.
Received for Cal & Status Change
By default, using the Status Change activity dialog will (a) update the Status code in the Equipment record and (b) save a Note in the Equipment record and Change Log describing that this status change took place.
Additionally, if a specific Status code is defined in the Options > Advanced > Calibrations, the 'Received Date' auto-populates in the Equipment record when this Status code is used in the Status Change dialog. Check the box to null the Received (for Cal) Date field in the Equipment record whenever the new Calibration Event is saved with a 'Passed' Status.
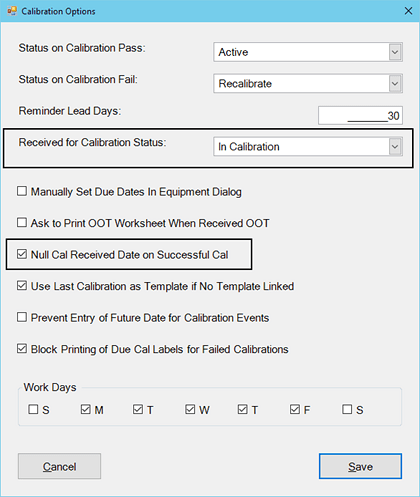
Alternatively, in the reverse sense, if the Equipment Status code is changed from its designated Received status using the Status Change dialog, then the Received (for Cal) Date automatically clears in the Equipment record. The Received for Cal Date remains historically documented in that calibration record.
Multi-Transactional Dialog (Video)
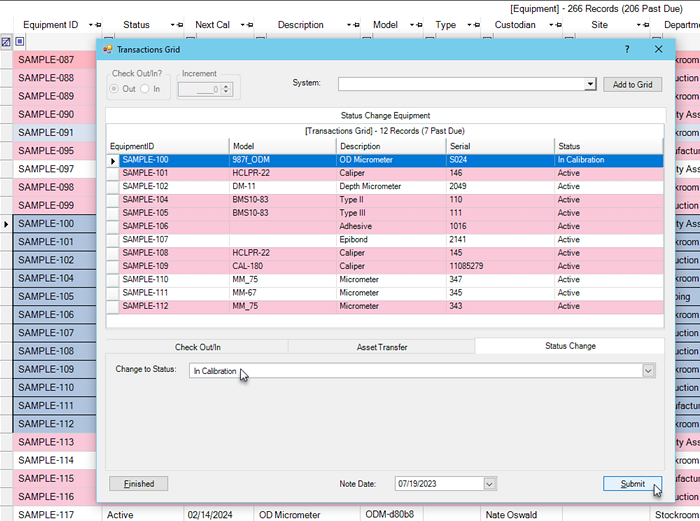
Multiple equipment (including Systems) can have Status Changes performed in a single transaction in version 9.4 and higher. Watch the video to utilize the optional multi-transactional dialog tool, instead of the traditional dialog.
If the option is enabled, right-click within the Equipment grid or use the ribbon menu icon to open the Status Change feature.
Highlight multiple Equipment record rows in the grid and right-click for the context menu, as demonstrated in the video, to select one of the transaction activities between Check Out, Asset Transfer, and Status Change.
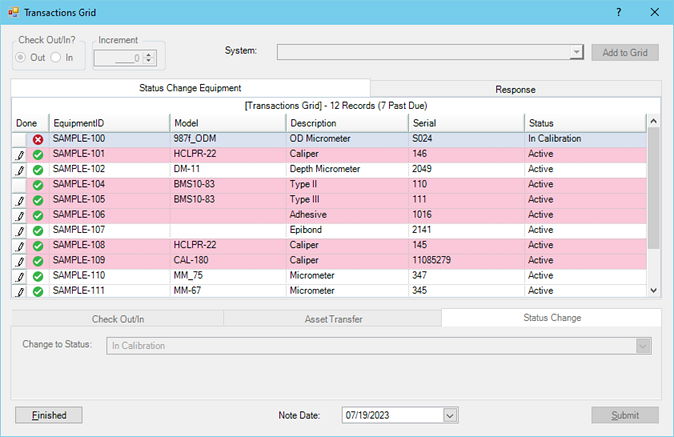
Upon submission, a green checkmark will appear next to the confirmed records of status changes. A red X icon will appear next to the records that may have failed to make the status change.
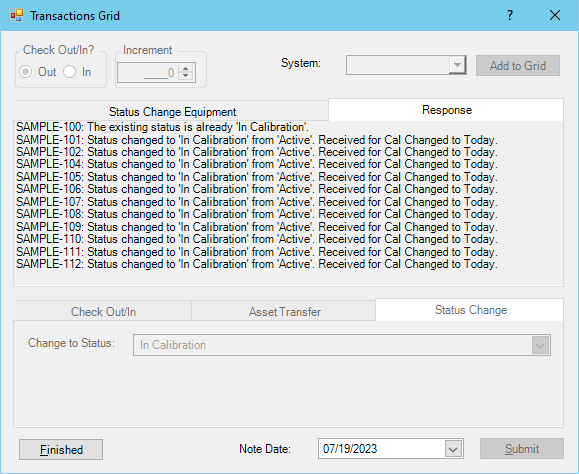
After confirmation, view the Response tab of the dialog for more details.
Equipment History Notes
Review all transaction history in the equipment records, as the activity for Check Outs, Status Changes, and Asset Transfers automatically populate and store as Notes. Double-click on a Note record to manually input additional details and remarks or link Note to more records, (i.e,. share visibility of the Note by linking it to other Equipment, Companies, or People records).
Last Updated: 15 September 2024

